Patented & proven solutions
Damp? Musty? Humid? Get a dry, healthy crawl space today!
Get a free estimateBefore & After Photos
Click on a photo to enlarge.
Fairview, NC has Super Sump Plus installed along with CleanSpace
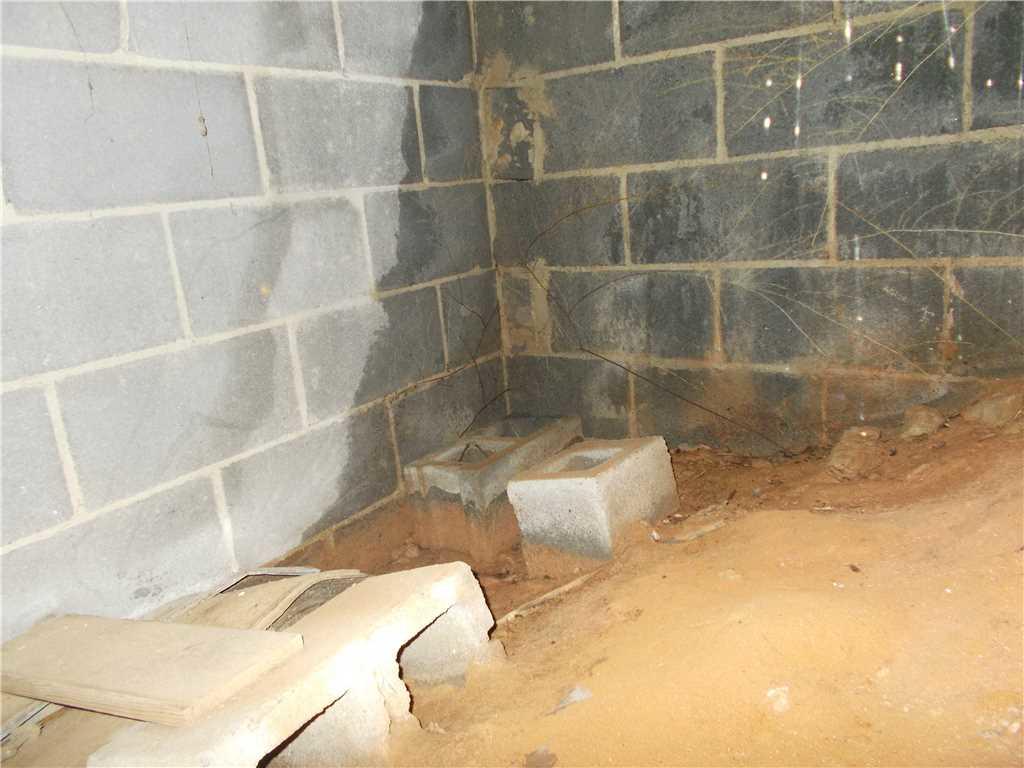
No one likes a damp crawlspace. But no one really wants to go in to inspect the space when it’s dirty and humid. Many crawlspaces tend to look like a deserted wasteland, and people will eventually just accept that fact. But when there’s a dirt floor in the crawlspace without a barrier, moisture issues are almost unavoidable. And having a water pump system is nice, but those moisture issues may still persist if you don’t cover the dirt floor with a sufficient material and seal the space to prevent the vapor from rising up from the dirt floor. That was the problem this home had in Fairview, North Carolina.
In this crawlspace, there is efflorescence on the cement block walls, which is the residue left behind by that sneaky water vapor. Moreover, there’s clear evidence that the space has flooded several times over the years. The dirt floor is sloping and the concrete blocks are shaded by dirt and dried water. This is problematic because as long as there is no barrier the water vapor will continue to rise into the space, making it damp and humid, leaving dried water all along the walls.
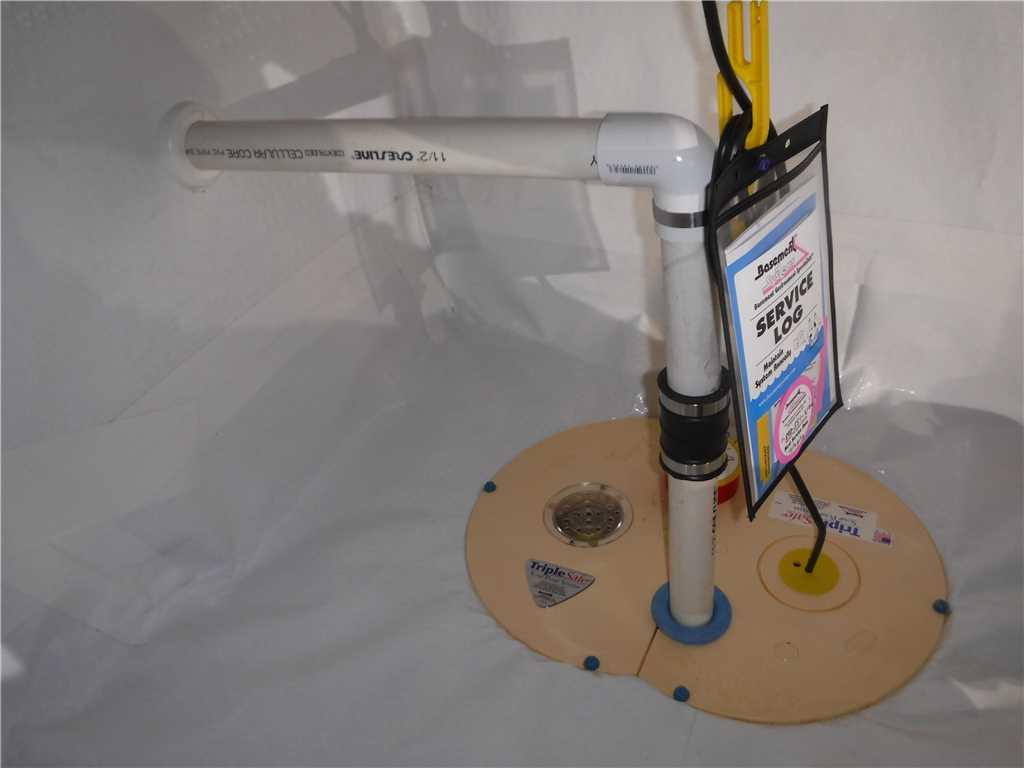
In the after picture, we’ve solved this problem completely. We’ve laid CleanSpace, which is a 20 mil thick plastic liner, to cover the dirt floor and prevent water vapor from rising into the space. We’ve also installed a Super Sump Plus, to take care of the flooding problem. Our pump contains a WaterWatch alarm system that sounds off if water rises above the point where the pump should turn on. It has a SuperLiner with 96 holes that allow water to flow in directly from below the floor and an airtight lid which keeps moisture from evaporating into the basement environment. What you see here is the finished product.
We Install WaterGuard in Basement Burnsville, NC

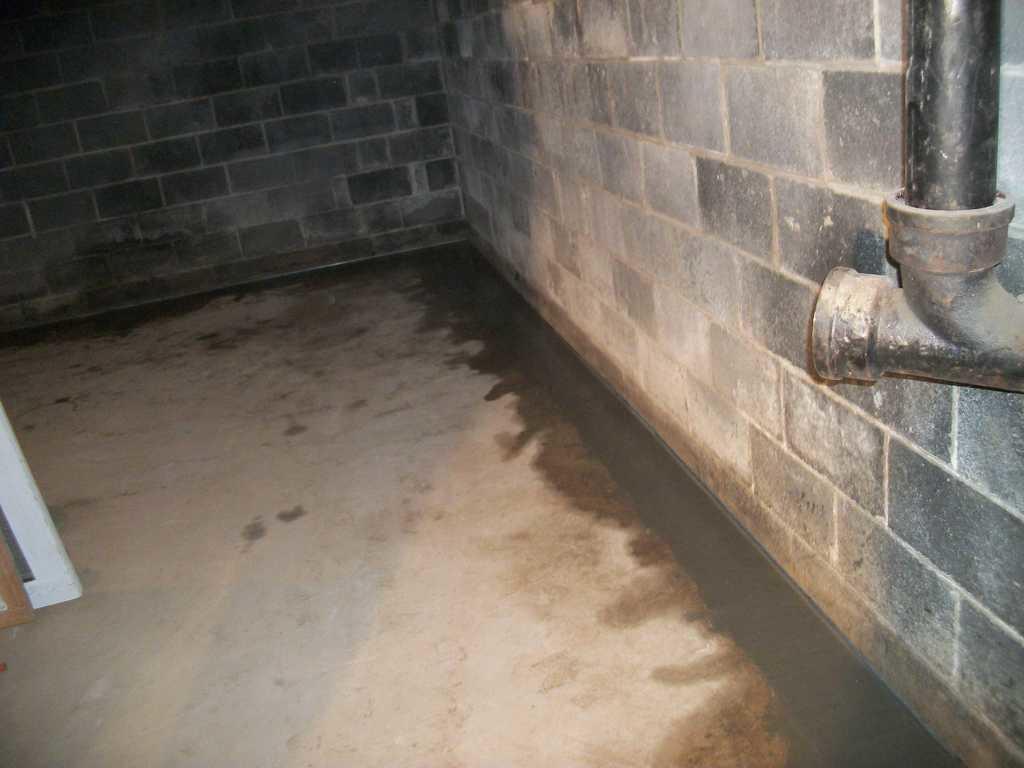
Repeat after me: WaterGuard is the way to go. Did you say it? You should have because it’s true. Our WaterGuard is the piping system many competitors wish they had. WaterGuard intercepts water at the perimeter of the basement and drains it away unseen. It’s the perfect product for any basement that is having water intrusion issues. This Burnsville, NC basement was no different.
Our ‘before’ photo showcases a relatively normal basement. It looks fine at a glance. However, if we take a look closer, we begin to notice this ghostly white residue along the walls. You guessed it. That’s efflorescence. It’s what is left behind after water has come and gone. It’s not the prettiest thing in the world, but most homeowners have no idea how to deal with it.
That’s where All-Dry of the Carolinas comes into play.
We use a large variety of products here at All-Dry of the Carolinas. Even so, one of the last things we want do is hand a customer more than what they need. In this ‘after’ photo, you can see how we kept it simple. This basement called for WaterGuard and that’s what we delivered. We made a small incision along the perimeter, as we promised, inserted the WaterGuard system, and walked away. The job was done. We covered it with cement, and as soon as it dries, no one will notice the difference.
WaterGuard installation in Greenville, SC


Water was getting into the basement in Greenville, SC by dripping down the walls and puddling in the floor. To solve this problem our All-Dry of the Carolinas team installed WaterGuard. WaterGuard was added around the perimeter of this basement, it intercepts the water and drains it unseen and safely into the SuperSump Pump where it is then flushed from the basement. WaterGuard is different because it is designed to not sit in dirt like most draining systems do. There is a special wall flange that creates space between the floor and wall allowing wall seepage to drain through the WaterGuard while keeping it away from the dirt. Since this type of drainage is separated from dirt, the chances of it clogging are nearly impossible! The WaterGuard directs the water to the SuperSump Pump where it is then flushed from the basement outside to the LawnScape outlet. All resulting in a dry basement!
In the “before” picture you see the basement floor before the WaterGuard is installed. WaterGuard is installed by digging a trench around the perimeter of the basement. Water is then flushed into the trench to test if water will flow smoothly downwards towards the SuperSump Pump. If the water puddles instead of draining, the trench will be deepened to allow the water to flow. Weep holes are drilled into the base of the wall so that water can flow from the base of the wall into the WaterGuard instead of building up and seeping down the walls. From there the WaterGuard is placed into the trench where it is covered with concrete that makes the system invisible. The “after” pictures shows the finished look once the system is installed.
WaterGuard in Greenville, SC basement hallway


This is yet another home in Greenville, SC that had a basement with water seeping into it. This is another prime example of hydrostatic pressure forcing water through the walls of basements. The renter or this property called us at All-Dry of the Carolinas where we sent out our design specialist, Alex Rogers to check out the problem. Once Alex got to the home he saw that water had been leaking down the walls of the basement. This basement needed a combination of WaterGuard, CleanSpace wall and a SuperSump pump to take care of their problem.
The perimeter was jackhammered down to the footing of the basement. WaterGuard, which is an interior waterproofing drainage system, is then installed in the trench that had been created by the jack hammer. WaterGuard is placed into the trench, with its 3/8’ wall flange against the wall, and angled in a downward slope so that water can flow towards the SuperSump pump that was placed in the basement. Once in the correct position, the WaterGuard is covered with gravel to keep make the drainage system stable. CleanSpace Wall is then tacked on the wall and tucked in behind the WaterGuard wall flange so that any wall water seepage will be pushed straight into the drainage system and into the sump pump. Once the CleanSpace wall is in place behind the WaterGuard, the WaterGuard is then covered with cement which evens out the floor and makes the system invisible.
The WaterGuard is connected to the SuperSump pump so any water can be drained into it. The sump pump will flush the water out once it reaches a certain spot. When the sump pump flushes the water, it goes through a piping system and through the LawnScape outlet where the water flows into the yard away from the home.
Low Crawlspace in Greenville, SC Gets New CleanSpace Encapsulation


This crawlspace that was located in Greenville, South Carolina was having a pretty unpleasant odor coming from it. This was something that the homeowner wanted to get taken care of immediately. Fortunately, this homeowner had heard a lot about our systems and already knew how effective these systems would be at solving her problems. She quickly set up her estimate, signed her contract, and was ready for an installation date.
Within a month from our Systems Design Specialist's first meeting with the homeowner, the crew began the first installation (of many). This first installation included; CleanSpace, a SmartSump Pump, a dehumidifier, as well as several other smaller things that were done. The crew started by installing the SmartSump, by digging out an area and putting it in. They then started to install the CleanSpace liner, which was certainly the biggest part of the project.
As you can see in the difference between the two pictures, CleanSpace makes a pretty significant difference in the way that the crawlspace looks. It helps to brighten up the area and seal off the crawlspace from the outside. It helps to keep moisture out of the crawlspace, which also keeps out the smell that the homeowner originally called about. Overall the system that this homeowner went with was a great decision and has solved her headaches!